

TABLE OF CONTENTS
15 CS6 and CC Photoshop Secrets You'll Love
Sep 2, 20143958 views
Sep 2, 20143958 views

There is no doubt that Photoshop has become a part of modern culture. You don’t have to be a designer to know about the ‘almighty’ software that seems to have no limitation over image editing. Being such an influential tool, no one seemed to be shocked when the word ‘photoshop’ simply became one of those spontaneous new verbs. Photoshop 1.0 was first launched in 1990, since then, new versions have been released to keep up with photo retouching developments. The latest ones are Photoshop CS6 (2012), Photoshop CC (2013), and the fresh from the oven Photoshop CC 2014. We decided to talk to some professionals and look for reputable tutorials to bring you some of the best-hidden gems of the latest versions. So let’s take a look at what they have to offer and see what the graphic design pros love about them.
Check Out these 15 Photoshop Secrets to dominate the CS6 and CC Suites
1. CS6’s and CC's Nondestructive Crop Tool
The seemingly small change makes a big difference when it comes to preserving information. Not only are the handles easier to use, but it is also easier to go back and recover the dismissed area. Additionally, you can preset the tool to keep the photo dimensions instead of holding the shift key.
2. Smart Sharpen Differences
You’ll find a few differences between CS6’s and CC’s smart sharpen filter. Both improved from previous versions. Photoshop CC includes the Shadows/Highlights options, allowing you to have more control over the sharpen tool. Plus, you can reduce noise from the smart sharpen filter now. 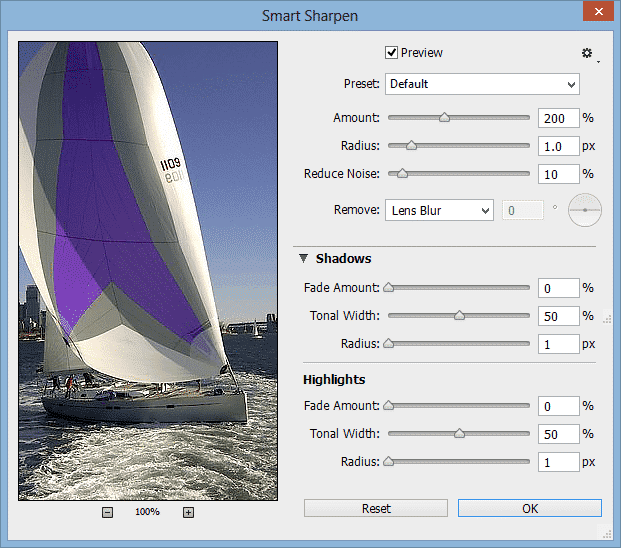
![]()
3. Generate Images by Changing Layer Names
You can generate images by changing layer names on both Photoshop CS6 and CC. However, CC allows more characters, which means more images. All you have to do is enable image assets (from the file tab) and specify the kind of file you want. For example, if the layer is called ‘image.png’, photoshop will create a png file from that layer called ‘image.’ You can create several images by separating such names by commas and type the desired size first (e.g. 400x400 image.png, 503x403 image.png) which you can later use for thumbnails or size samples.
4. Adding Scripted Patterns
Photoshop CS6 allows you to create scripted patterns from default ones to your very own creations. Just click edit >fill and you’ll find 5 scripted pattern options to choose from. Plus, the CC version included a ‘Tree’ pattern, where, you guessed it, you can add a very realistic tree to any scenery. 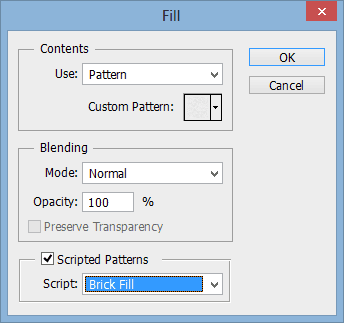
![]()
5. Creating Picture Frames
This option is also part of CC’s scripted patterns (edit > fill > scripted patterns > picture frame). It has everything from standard lines to more elaborated and decorative elements. You can add as a theme to your pictures or maybe create a personal style of publications.
6. Turn the Background Into a Layer
This is not a new feature, but Photoshop CC added yet another way to do it with a single click. Basically, all you have to do is click the lock and instantly turn your background into a layer. It doesn’t get any easier than that. For more details about image generation, scripted patterns, picture frames and background unlock, watch Terry White’s great tutorial here.
7. CS6’s Merge to HDR Pro
Merging several images is a good way to tone an image and get nicer results. The feature also includes an ‘edge smoothness’ option, which is very useful after the merging process.
8. CS6’s Photo Toning Presets
This feature is definitely a great gift for photographers. If you choose ‘gradient map’ as an adjustment layer, you’ll find the ‘photographic toning’ option as part of the gradient editing preferences. You can play with a vast range of color effects to fit the style of any project.
9. CS6 Brought Contact Sheet Back
This feature was not a part of Photoshop CS5, but it came back with CS6. What it does is create a contact sheet from a folder of images. It lets you choose from different settings and ultimately optimizes the process for you. You can click here to watch Scott Kelby’s tutorial on some of these useful features.
10. CC’s Camera Raw Filter
This new filter has everything you need to bring any .jpg to the standard you want. It allows you to treat is as raw file from the same layer, with no need for external tools.
11. CC’s Shake Reduction Feature
We can now fix blurred images with the ‘shake reduction’ feature by clicking filter > sharpen > shake reduction. As soon as you open the smart filter, there will be a automatic assessment of the image. However, you will be able to apply more controlled changes to smaller loops. This is a great feature to reconstruct those blurred images we would normally just delete. If you want to see the new filter in action, click here to watch lynda.com’s tutorial. 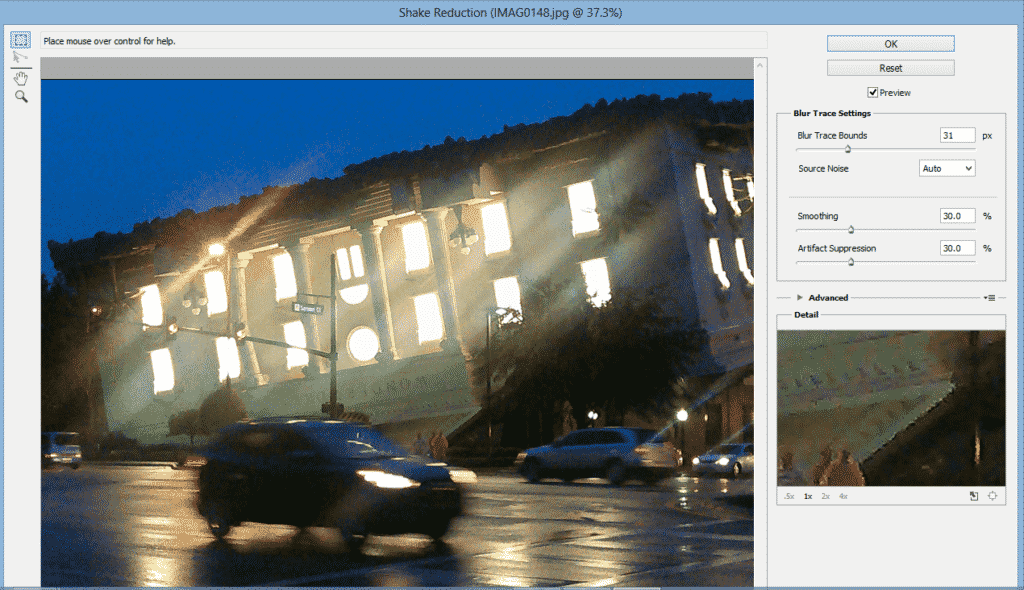
![]()
12. CC’s Perspective Warp
This feature was added in the January 2014 Photoshop CC update. It simplifies the process of warping an object without losing its realistic looks. We can tell the software what the current perspective, so we can warp it easily. It comes with a couple of automatic features, but you can do it manually for more accurate results. You’ll find it by clicking edit > perspective warp.
13. Removing Elements From a Stack of Photos With Photoshop CC
You would usually take a number of photographs from the same angle to make sure you’ve got the perfect shot of a monument or landscape. And if that happens to be a place with lots of traffic, there’s a chance you’ll end up with a series of pictures with unknown walking people. If you select a group of layers with this description, auto align them and then convert them to a smart object, you can easily remove the moving objects and leave the static ones. Meaning, the buildings and landscape will stay and the people will go. All you have to do is click layer > smart objects > stack mode > maximum.
14. Adding More Than one Focus Point With Photoshop CS6 and CC
As you now, Photoshop CS6 came with a new blur gallery. One of the favorite tools involves an action that you can’t actually accomplish without digital manipulation. Which is adding two different focus points to the same photograph. You will be able to manipulate them from their respective blur features dialogue panels and come up with interesting results.
15. CS6’s and CC's Adaptive Wide Angle
This filter is a more efficient way to deal with fisheye lens corrections. You will be able to draw intuitive lines in order to straighten certain elements, such as buildings, ground lines, or horizons. The reason it works so well is that it identifies the lens used to take the photo and can perform the necessary adjustments. 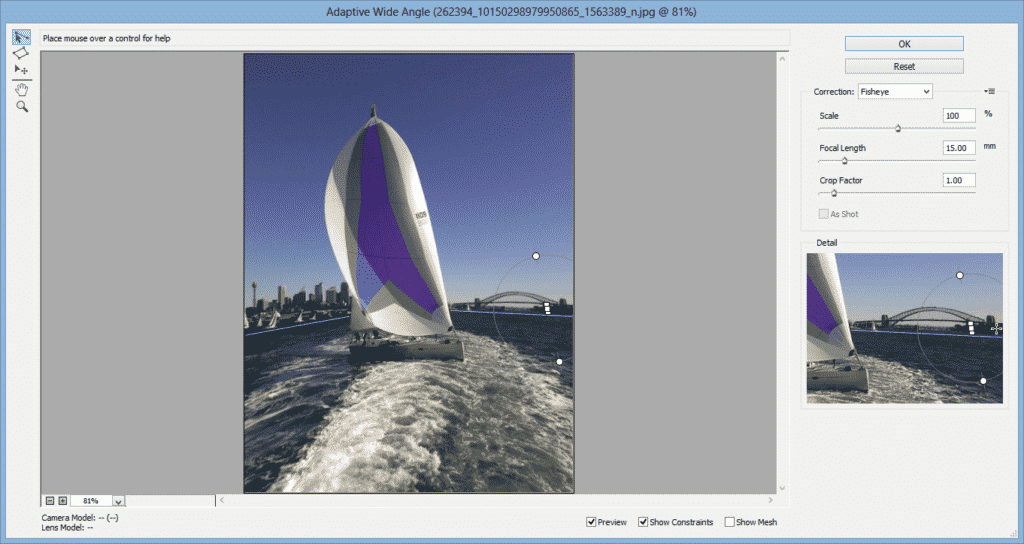
![]() Are you ready to start designing like a pro? Remember that all tools are only great if they fit your purpose and let your creativity flow. Feel free to share some of your favorite graphic design resources as a comment below and tell us what you love about them. Also, our online catalog is filled with custom print products for you to bring your designs to life. Click here to check it out
Are you ready to start designing like a pro? Remember that all tools are only great if they fit your purpose and let your creativity flow. Feel free to share some of your favorite graphic design resources as a comment below and tell us what you love about them. Also, our online catalog is filled with custom print products for you to bring your designs to life. Click here to check it out![]() !
!
More from Graphic Design
31902
In today’s fast-paced business world, a well-designed business card can be your secret weapon. It’s more than just a piece of paper; it’
![]() Matthew Prince
Matthew Prince
Feb 3, 2023

5254167
If you had to choose between a plain colored or bold colored custom envelopes, which one would you choose? Color influences a person to open a
![]() Emma Davis
Emma Davis
Jul 18, 2020

5324179
Are you aware that
![]() Emma Davis
Emma Davis
Jun 17, 2020

3504793
So, you've decided to take the leap and print flyers
![]() Emma Davis
Emma Davis
Jun 4, 2020

3904413
One of the most perfect ways to showcase your company brand is by use of custom hang tags. These serve as a brilliant opportunity to have cust
![]() Emma Davis
Emma Davis
May 28, 2020

4824391
Marketing allows a vast window for business creativity in today’s world. One of those creative marketing gimmicks is the use of perforated w
![]() Emma Davis
Emma Davis
May 21, 2020

3453631
Have you ever received a postcard? If you have, you must know how warmth-inducing and thought-provoking they are. Now how would you feel if yo
![]() Emma Davis
Emma Davis
May 14, 2020

6063731
If you have been in any business; big or small, you know that it takes a lot of small efforts to make a big milestone. You also understand how
![]() Emma Davis
Emma Davis
May 14, 2020