

TABLE OF CONTENTS
How to Cover Furniture with Stunning Vinyl Sticker Wrap
Aug 9, 20205351 views
Aug 9, 20205351 views

Transforming your vehicle or belongings with a vinyl sticker wrap is an exciting way to make a bold statement or advertise effortlessly. These versatile wraps not only let us showcase creativity but also serve practical purposes like protecting surfaces or promoting businesses. With their vibrant designs and durable finishes, vinyl wraps have become a favorite for both personal and professional use.
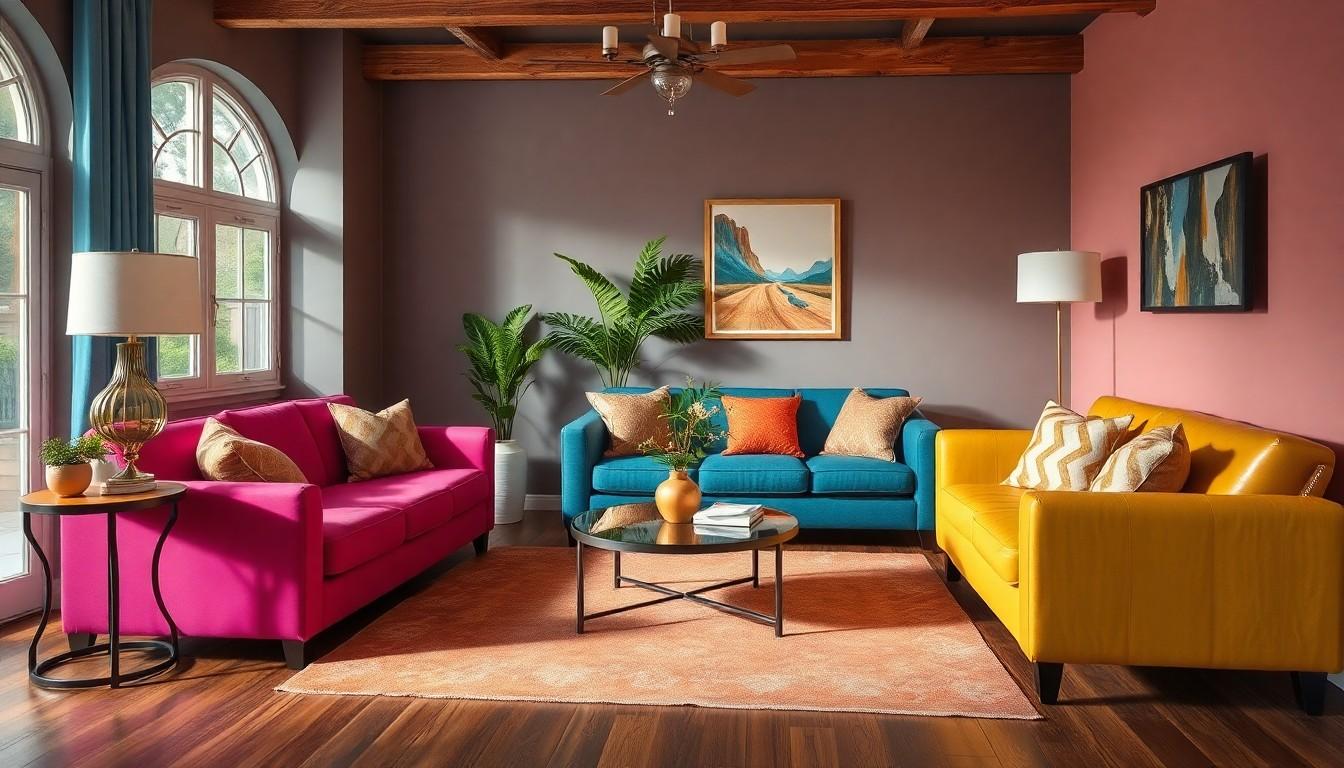
Transforming Furniture with Vinyl Wraps
Vinyl wraps offer a simple, effective way to refresh furniture without investing in replacement or expensive repairs. This method is ideal for smooth surfaces such as tables, cabinets, or countertops, as vinyl wrap adheres only to sleek, even finishes. For surfaces with texture or fabric, it is better to explore alternative options as adhesion is not effective.
Preparing the Surface
Cleaning and drying the application surface ensures the vinyl sticks properly. A light spray of water or mild cleaning product wipes away dirt and dust. Using a damp cloth for cleaning followed by a dry cloth guarantees a spotless, dry surface. This preparation step is critical for achieving professional results.
Measuring and Cutting the Vinyl
Accurate measurements simplify the cutting process. Adding at least 3 cm to each side during measurement accommodates overcuts and corrects minor misalignments. A straight edge or ruler helps mark precise lines before trimming the vinyl with scissors or a sharp blade. Straight cuts reduce material wastage and simplify alignment during application.
Applying the Vinyl
Peeling back just one edge of the backing paper reveals the adhesive side. Aligning this edge of the vinyl with the furniture ensures a clean, straight application. A smoothing tool like a card or flat object presses the vinyl down evenly while slowly removing the backing. This method prevents air bubbles and wrinkles.
After setting the vinyl, a heat gun enhances adherence for detailed areas like edges or corners. Heat activation increases tackiness and enhances bonding, turning the wrap into a durable, lasting design.
Aesthetic and Practical Benefits
Vinyl wraps provide exciting customization options, from sleek solid colors to intricate patterns. They are also excellent for protecting furniture from scratches or stains. Businesses can use wraps for branding purposes by incorporating clear adhesive vinyl![]() into displays or promotional furniture setups.
into displays or promotional furniture setups.
Let vinyl wraps elevate your furniture's appearance while adding practical advantages to meet unique needs.
Choosing the Right Vinyl for Your Furniture
Types of Vinyl
Selecting the appropriate type of vinyl is essential for achieving the desired look and functionality. Different options provide unique finishes to match any aesthetic:
- Solid Color Vinyl Wraps: Available in a wide array of colors, they work well for clean, simple updates. For example, a bright blue or pastel pink wrap can completely transform a dull side table.
- Wood Grain Vinyl Wraps: Designed to replicate real wood textures, they offer an affordable way to achieve rustic or traditional looks on furniture like cabinets or shelves.
- Metallic Vinyl Wraps: These wraps add a modern, futuristic touch, perfect for accent pieces like bar carts or coffee tables.
Explore adhesive vinyls![]() for a variety of colors and finishes to suit different projects.
for a variety of colors and finishes to suit different projects.
Material Compatibility
Vinyl wraps adhere best to smooth, non-porous surfaces. They're compatible with materials such as MDF, plywood, chipboard, particleboard, veneer, plastic, stainless steel, and wood. Surfaces like fabric or heavily textured finishes don't allow proper adhesion. Using clear adhesive vinyl![]() can also preserve the original design while adding a protective layer.
can also preserve the original design while adding a protective layer.
Images showing examples of vinyl wraps applied to different furniture types would enhance this section visually.
Matching Functionality to Design
When choosing vinyl, consider usage and placement. For high-traffic areas needing durability, prioritize options offering scratch resistance. For decorative projects, focus on aesthetic elements like color or finish. Leveraging 4OVER4.COM's custom printing solutions lets businesses and individuals personalize their vinyl selections for unique brand representation or creative home design.

Essential Tools for a Smooth Application
Applying a vinyl sticker wrap effectively requires specific tools to ensure a flawless finish. Each tool plays a key role in achieving professional results and avoiding common issues like air bubbles or uneven edges.
Squeegee
A squeegee with a felt edge is essential for smoothing out the vinyl and removing air bubbles. The type of felt matters depending on the surface. Hard felts work well on rough surfaces, soft felts are ideal for glossy finishes, and medium felts suit most general applications. Using the right squeegee ensures even pressure during application, contributing to a clean and polished look.
Heat Gun or Torch
A heat gun or torch softens the vinyl, enabling it to stretch and conform to complex curves, edges, and contours without tearing or wrinkling. This is critical for detailed or textured surfaces. Controlled heat application increases pliability, helping achieve better adherence in intricate areas.
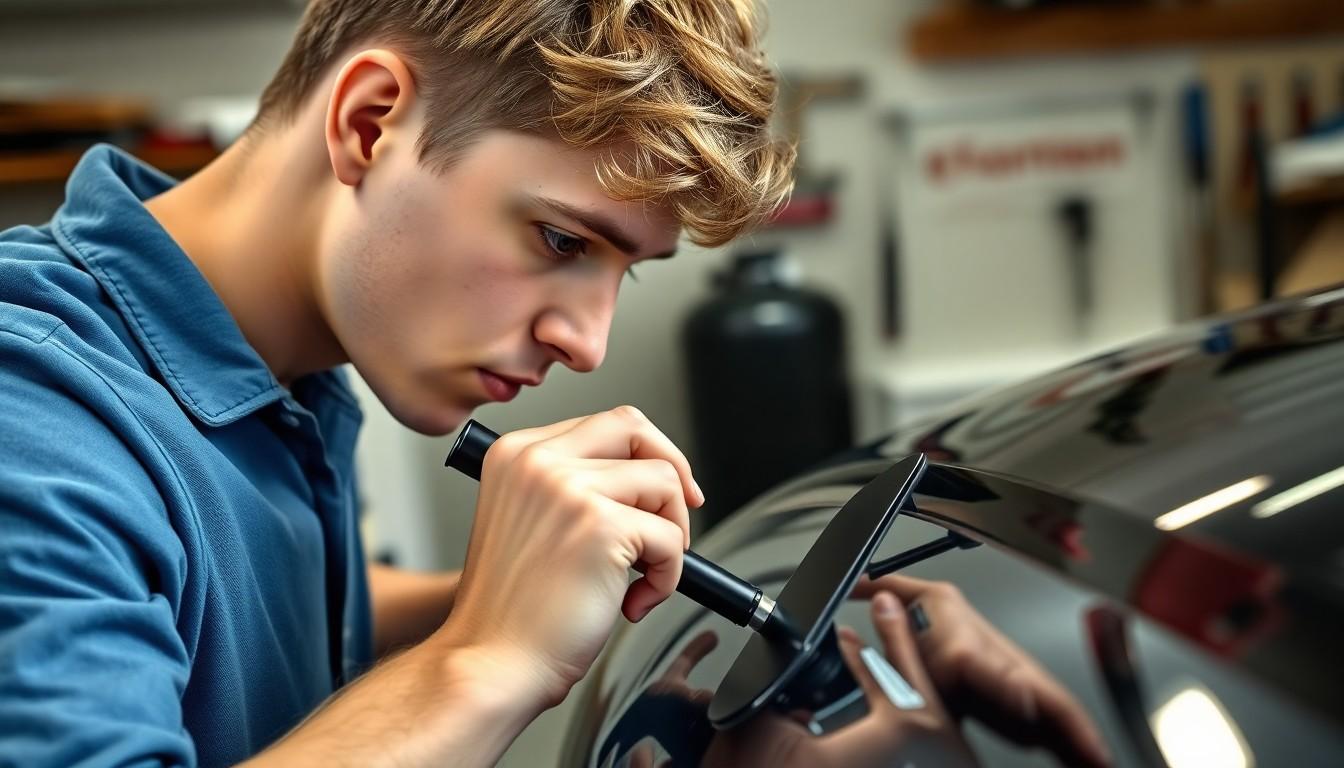
Precision Knives or Cutting Tools
Sharp cutting tools, such as retractable utility knives or precision blades, are vital for trimming the vinyl to exact measurements. These tools are also used for creating relief cuts, which prevent creasing in curved sections. Precise cuts result in clean edges, enhancing the overall appearance of the wrap.
The Role of 4OVER4.COM
Our approach to custom vinyl wraps, paired with tools like squeegees and precision blades, provides businesses robust branding opportunities. 4OVER4.COM offers high-quality solutions to elevate your brand's impact, ensuring your adhesive vinyl wraps make a lasting impression.
Prepping Your Furniture for Wrapping
Preparing furniture for a vinyl sticker wrap begins with cleaning the surface thoroughly. Dust, dirt, or oil residue can prevent proper adhesion. Using a mild detergent or 70% isopropyl rubbing alcohol ensures the furniture is free from contaminants. Once cleaned, the surface must be completely dry, as moisture can weaken the vinyl’s adhesive quality.
Inspect the surface for imperfections such as scratches, holes, or uneven textures. Sand down rough edges, and fill in any holes with a suitable filler. Smooth surfaces, such as MDF or stainless steel, provide the optimal base for vinyl wraps. Bumpy or fabric-like surfaces won't allow adequate adhesion, so their use should be avoided.
Measurement & Cutting
Accurate measurements reduce vinyl waste. Include an overhang of at least 3 cm on all sides during cutting for adjustments. Using a ruler and a precision knife ensures clean, straight edges.
Surface Inspection
Even minor details matter. Deep scratches or holes can show through the vinyl if left untreated. Sanding and refinishing enhance the final appearance. Strive for a polished, smooth surface to achieve professional results without visible flaws.
By thoroughly preparing furniture before applying the vinyl, we create durable and visually appealing results that align with branding needs or home decor projects. 4OVER4.COM offers high-quality custom solutions for adhesive vinyl wraps.
Step-by-Step Guide to Applying Vinyl Stickers
1. Gather the Necessary Tools
Begin with tools designed to ensure precision and durability. A squeegee with a smooth edge helps avoid creases, a cutting knife allows precise trimming, and a heat gun aids in adhering the vinyl to intricate surfaces. Having masking tape on hand ensures proper alignment during application.
2. Clean the Surface
Prepare the surface by thoroughly cleaning it to eliminate dust, dirt, or grease. A clean surface promotes long-term adhesion. Use mild detergents or isopropyl alcohol, then dry completely to prevent any moisture from hindering the bond. For glass or smooth surfaces, soapy water provides an extra layer of cleanliness.
3. Measure and Cut the Vinyl
Take accurate measurements of the application area. Precision is key to minimizing waste and achieving a seamless appearance. Use a ruler or measuring tape to mark the dimensions, and cut the vinyl accordingly using a sharp knife to maintain clean edges. Custom-cut designs from 4OVER4.COM make it easy to align your application with your branding or creative needs.
4. Position the Vinyl
Place the vinyl in the desired area, keeping the backing intact. Secure it temporarily with masking tape or make marker points for alignment. Carefully remove small sections of the backing at a time as you adjust and stick the vinyl to the surface.
5. Apply and Smooth
Utilize a squeegee held at a 45-degree angle to flatten the vinyl from the center outward. Smooth evenly to eliminate air bubbles and creases. For larger decals, start from one corner and gradually proceed using slight pressure. In detailed areas, apply controlled heat using a heat gun to adhere effectively.
6. Remove Transfer Layer
Once the vinyl is securely applied, slowly peel off the transfer tape at a sharp angle close to the surface. Proceed carefully to avoid lifting the design. Allow the vinyl to cure for a full 24 hours before exposure to water or cleaning.
4OVER4.COM enhances brand presence with professionally printed custom vinyl wraps, offering a streamlined process to achieve impactful designs. Let your branding stand out with adhesive vinyl solutions tailored to your needs.
Avoiding Bubbles & Wrinkles for a Flawless Finish
Achieving a smooth, professional-grade finish with vinyl sticker wraps requires attention to detail during application. Air bubbles and wrinkles can compromise the look and durability, but careful techniques ensure optimal results.
Proper Smoothing Techniques
Use a squeegee with a felt edge to press the vinyl onto the surface as you apply it. Start from the center and work outward to push out air and prevent bubble formation. Hold the vinyl at a slight angle to make adhesion more controlled and effective. For challenging areas, avoid rushing the process to maintain smooth coverage.
Heat Application for Flexibility
Gently heat the vinyl with a heat gun to soften it when working on curves or uneven surfaces. Heated vinyl becomes more pliable, conforming seamlessly to complex shapes without creases. Maintain even heat distribution to prevent overstretching or discoloration. This method is essential for enhancing adhesion around edges or contours.
Bubble Removal
If bubbles form, use a fine pin to puncture the vinyl lightly at the bubble's edge, then press the air out with the squeegee. Avoid piercing the center to reduce the risk of visible marks. For larger bubbles, lift the section carefully, reapply, and smooth while eliminating trapped air gradually.
Wrinkle Management
Pull back wrinkled sections slowly and smooth them down again using the squeegee and heat. Avoid pulling forcefully to maintain the vinyl's structural integrity. Heat application is effective here as well, making it easier to reset the material without damage.
Elevating Brand Aesthetics with 4OVER4.COM
Custom vinyl wraps from 4OVER4.COM provide businesses with high-quality solutions for impactful designs. From creating dynamic storefront displays to promoting brand imagery, their adhesive vinyls enhance both the practical and aesthetic aspects of any project. Explore a variety of options, including clear adhesive vinyl![]() , for versatile applications suited to your brand's needs.
, for versatile applications suited to your brand's needs.
By following these steps and leveraging resources like 4OVER4.COM’s adhesive vinyls![]() , flawless results become achievable with every application.
, flawless results become achievable with every application.
Creative Design Ideas for Different Furniture Pieces
Transforming Tables and Desks
Use wood grain vinyl wraps to replicate the look of oak, walnut, or mahogany on tables and desks. Pair lighter wood tones with modern decor or darker grains with a vintage aesthetic. For a sleek finish, clear adhesive vinyl can serve as a protective layer while enhancing natural textures. Whether for a home office or a coffee shop setup, these wraps create professional and polished surfaces.
Refreshing Cabinets and Drawers
Apply solid color vinyl to kitchen cabinets for a dramatic transformation. Bright colors like mint green or mustard yellow add vibrancy, while matte black or gray vinyl wraps create a minimalist style. Add metallic finishes to drawer fronts for an industrial-inspired design. These customizations, possible with adhesive vinyls, allow brand representation in commercial spaces like cafes or boutiques.
Enhancing Shelves and Storage Units
Add bold patterns or geometric designs to shelves to make them stand out. Use vinyl with marble or terrazzo effects for luxury finishes in living rooms or retail displays. Adhesive vinyl wraps, like those available through 4OVER4.COM's adhesive vinyls![]() , provide durability while making furniture visually appealing.
, provide durability while making furniture visually appealing.
Resurfacing Doors and Panels
Experiment with metallic or matte vinyl wraps for doors. Opt for gold or silver tones to bring a touch of glamour or pastel shades for a softer appearance. Vinyl wraps can cover panel defects, offering an affordable renovation alternative. A custom-printed vinyl wrap, created through services like 4OVER4.COM, ensures cohesive designs that match unique branding themes or home designs.
Personalizing Child Furniture
Design playful themes using custom-printed vinyl for children’s furniture. Add animal prints, cartoon characters, or bright patterns to beds, small tables, and toy boxes. These designs create an engaging space for children, enhancing functionality and style simultaneously. Explore options like clear adhesive vinyl![]() to preserve new finishes.
to preserve new finishes.
Incorporating Seasonal Themes
Apply vinyl wraps featuring seasonal motifs like autumn leaves or winter patterns to furniture. Decorate tabletops, counters, or cabinet doors for festive occasions without long-term commitment. 4OVER4.COM's expertise in custom printing ensures high-resolution seasonal designs to adjust furniture aesthetics effortlessly.
Maintaining & Cleaning Vinyl-Wrapped Furniture
Cleaning Routine
Tools and Materials
We recommend using a soft microfiber cloth, mild dish soap, and warm water for regular cleaning. Avoid harsh chemicals or abrasive scrubbers to protect the vinyl surface. Adhesive vinyls![]() come with a protective layer that can be damaged by aggressive cleaning products.
come with a protective layer that can be damaged by aggressive cleaning products.
Cleaning Process
Clean the vinyl-wrapped furniture by starting with a damp microfiber cloth to remove loose dirt. Mix a small amount of dish soap with warm water, and use this solution to gently clean the surface. Too much pressure or vigorous scrubbing can weaken the adhesive or create surface scratches, so take a light-handed approach.
Drying
After cleaning, immediately dry any remaining moisture with a clean microfiber cloth. Proper drying prevents water spots and protects the vinyl’s finish.
Removing Stubborn Stains
For grease or oil stains, use a non-abrasive sponge with mild dish soap mixed in warm water. We suggest spot cleaning gently to avoid damaging the material. Persistent grime on patterned or clear wraps, like those found in clear adhesive vinyl![]() , can usually be removed with this solution without compromising design clarity.
, can usually be removed with this solution without compromising design clarity.
Storage Tips
To maintain unused vinyl wraps, keep them away from direct sunlight, heaters, or humid areas. Always store the roll vertically to avoid creases. Proper storage contributes to the longevity and usability of premium adhesive vinyl solutions from 4OVER4.COM.
Care for High-Use Areas
Hand washing is best for high-use areas like kitchen cabinets or tabletops. Using silicone squeegees for water removal and microfiber towels for drying ensures the surface stays scratch-free. Avoid abrasive tools, as they can lift the edges of the wrap over time. For long-term durability, focus on regular gentle maintenance while leveraging premium vinyl wraps for both function and aesthetics.

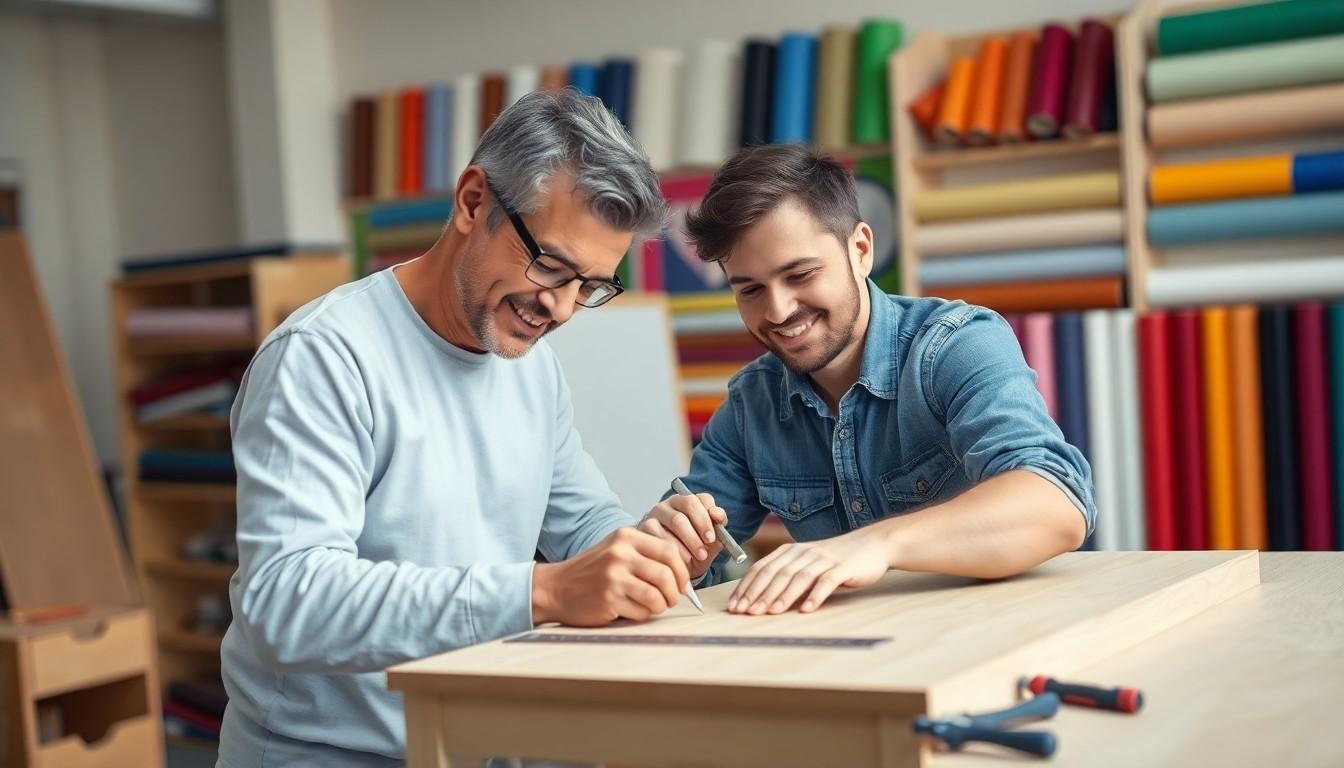
DIY vs. Professional Wrapping: Which is Best?
Cost Considerations
DIY vinyl wrapping is often more budget-friendly as it eliminates labor costs. The average expense includes purchasing tools, such as a squeegee, a heat gun, and precision knives, and materials like quality vinyl rolls. For basic wraps, costs can start at $20 per square foot. In contrast, professional installation can range from $500 to $5,000 depending on the vehicle or surface size, with custom finishes or intricate designs adding to the price. DIY wrapping works well for those seeking cost-effective methods, while professionals handle higher-budget projects needing precision.
Skill and Experience
Professional wrapping ensures expert-level precision, leaving no room for bubbles, wrinkles, or misalignments. Professionals use advanced tools and methods suitable for intricate crevices or curves, making them ideal for complex wraps. On the other hand, DIY wrapping relies on patience, a steady hand, and basic wrapping tools. Although resilient adhesives and air-release technology simplify the process, mistakes like over-stretching or tearing material can occur without prior experience. Professional installation reduces risks if the surface has imperfections such as dents or chips.
Time Commitment
Professionals complete wrapping projects faster, often within 24 to 72 hours, depending on size and complexity. DIY wrapping can take several days if it's your first attempt, extending to a week if errors like bubbles or wrinkles need correction. For quick turnarounds or business branding projects, professionals provide a time-efficient option, while DIY approaches suit personal projects with flexible schedules.
Longevity and Maintenance
Properly applied vinyl wraps by professionals often last up to 10 years, with maintenance such as hand washing increasing their lifespan. DIY wraps may last up to five years with good application and care. Nevertheless, professional installation ensures better longevity due to meticulous application techniques and durability under wear.
Branding Value with Custom Solutions
Custom vinyl wraps elevate branding potential for businesses. At 4OVER4.COM, we deliver high-quality adhesive vinyls![]() for impactful designs. From unique graphics to logos, our printing solutions offer businesses a way to stand out. Professional installation complements branding efforts, ensuring clean finishes that reflect your business’s quality standards. For projects requiring versatility, clear adhesive vinyl
for impactful designs. From unique graphics to logos, our printing solutions offer businesses a way to stand out. Professional installation complements branding efforts, ensuring clean finishes that reflect your business’s quality standards. For projects requiring versatility, clear adhesive vinyl![]() solutions are particularly effective in adding subtle yet professional touches.
solutions are particularly effective in adding subtle yet professional touches.
Decision Factors
When choosing between DIY and professional wrapping, factors like budget, time availability, and desired quality play a significant role. DIY suits smaller projects or those with experience in handling application tools. Professional services ensure polished results for intricate designs or larger branding needs, combining technical expertise with premium materials.
Conclusion
Vinyl sticker wraps open up endless possibilities for transforming furniture and other surfaces with style and practicality. With the right tools, proper preparation, and a bit of creativity, we can achieve professional-looking results that reflect our unique tastes or branding needs. Whether we’re refreshing old pieces or adding a bold statement to new ones, vinyl wraps make it simple to combine functionality with aesthetic appeal.
By following the steps and tips outlined, we can ensure a smooth application process and long-lasting results. Let’s embrace the versatility of vinyl wraps to elevate our spaces and make every project truly stand out.
Frequently Asked Questions
What are vinyl sticker wraps used for?
Vinyl sticker wraps are used for customizing and protecting surfaces like vehicles, furniture, and belongings. They provide aesthetic appeal, protect surfaces from scratches, and enhance branding for businesses.
Can vinyl wraps be applied to furniture?
Yes, vinyl wraps can be applied to furniture like tables, cabinets, and shelves. They adhere best to smooth, non-porous surfaces such as MDF, plywood, or stainless steel.
How do I prepare a surface for vinyl wrapping?
Start by cleaning the surface with mild detergent or isopropyl alcohol to remove dust and grease. Ensure it’s dry, smooth, and free of imperfections by filling holes and sanding rough areas.
How do I avoid air bubbles when applying vinyl?
Use a squeegee to smooth the vinyl during application. Work from the center outward and use a heat gun for better adherence on complex surfaces.
Can vinyl wraps be removed easily?
Yes, vinyl wraps can be removed without damaging the surface if done carefully. Gently peel them off and use heat if necessary to loosen the adhesive.
What tools are needed to apply vinyl wraps?
Key tools include a squeegee for smoothing, a heat gun for flexibility, a precision knife for cutting, and masking tape for alignment during application.
How long do vinyl wraps last?
Professionally applied vinyl wraps can last up to 10 years. DIY wraps may last around five years, depending on the quality of installation and maintenance.
Can I wrap textured or fabric surfaces?
No, vinyl wraps adhere poorly to porous or textured surfaces, such as fabric. They work best on smooth, solid materials like metal, glass, or wood.
How do I clean vinyl-wrapped furniture?
Use a soft microfiber cloth, mild soap, and warm water for regular cleaning. Avoid abrasive sponges and harsh chemicals to preserve the vinyl’s integrity.
What is the cost difference between DIY and professional wrapping?
DIY wrapping costs start at $20 per square foot, while professional installations range from $500 to $5,000, depending on the project’s size and complexity.
Do I need a heat gun to apply vinyl wraps?
Yes, a heat gun helps soften the vinyl, making it easier to conform to curved or detailed surfaces. Proper heat application enhances durability and adhesion.
Can custom designs be printed on vinyl wraps?
Yes, custom vinyl wraps can be printed to match specific designs or branding needs. Services like 4OVER4.COM specialize in high-quality custom printed wraps.
Are vinyl wraps safe for kitchen cabinets?
Yes, vinyl wraps are an excellent option for updating kitchen cabinets, offering a durable and attractive finish. Ensure the surface is smooth and clean before application.
Can I use vinyl wraps for business promotion?
Absolutely! Vinyl wraps are popular for branding vehicles, signage, and promotional items, offering vibrant and impactful designs to attract customers.
How do I store unused vinyl wraps?
Store unused vinyl rolls in a cool, dry place away from direct sunlight and humidity to maintain their adhesive quality. Use protective packaging to prevent damage.
More from Cool Interesting

5424980
Have you ever seen business flyers without images or a proper la
![]() Emma Davis
Emma Davis
Jun 25, 2020

5324147
Are you aware that
![]() Emma Davis
Emma Davis
Jun 17, 2020

3504751
So, you've decided to take the leap and print flyers
![]() Emma Davis
Emma Davis
Jun 4, 2020

5274652
Can you ever think of a product without branding? Branding gives a polished appearance to your products and draws the attention of the custome
![]() Emma Davis
Emma Davis
May 28, 2020

3904387
One of the most perfect ways to showcase your company brand is by use of custom hang tags. These serve as a brilliant opportunity to have cust
![]() Emma Davis
Emma Davis
May 28, 2020

3453607
Have you ever received a postcard? If you have, you must know how warmth-inducing and thought-provoking they are. Now how would you feel if yo
![]() Emma Davis
Emma Davis
May 14, 2020

6063698
If you have been in any business; big or small, you know that it takes a lot of small efforts to make a big milestone. You also understand how
![]() Emma Davis
Emma Davis
May 14, 2020

4284834
From cheap stickers to custom vinyl stickers, this print marketing tool is slowly and steadily weaving its way into the commercial culture. Yo
![]() Emma Davis
Emma Davis
May 13, 2020