

TABLE OF CONTENTS
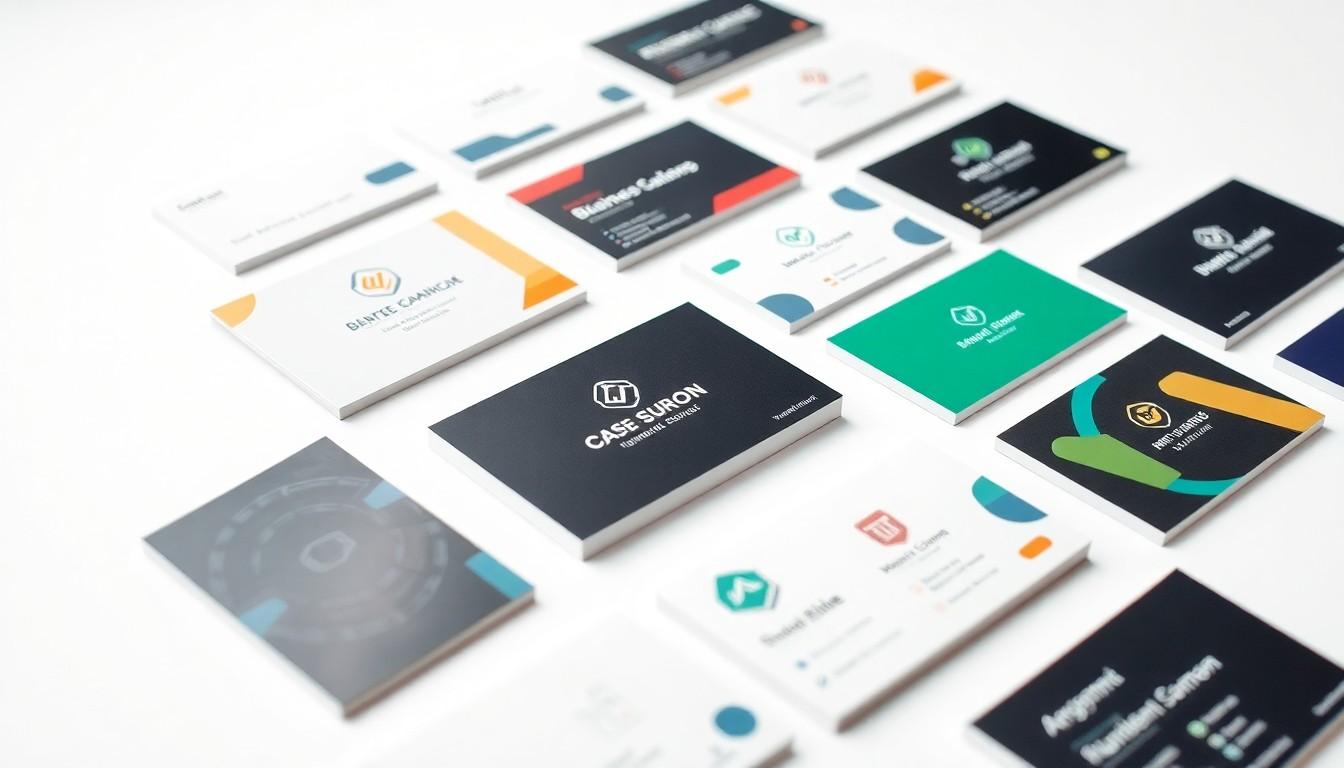
How to make business cards using Word
Aug 17, 20235452 views
Aug 17, 20235452 views

In today’s fast-paced world, making a memorable first impression is crucial, and business cards play a vital role in that. They’re not just pieces of cardstock; they’re powerful tools for networking and establishing our professional identity. Yet, many of us struggle with how to create a design that truly reflects our brand. The good news is we can easily craft stunning business cards using Microsoft Word, a program many of us already have at our fingertips.
This article will guide us through the straightforward process of designing business cards in Word. Whether we opt for a template or start from scratch, we'll discover how to customize every detail, ensuring our cards stand out. With just a little creativity and the right tools, we’ll be ready to make a lasting impression in any professional setting.
Creating Business Cards in Word
Creating business cards in Microsoft Word streamlines the design process while allowing us to showcase our brand effectively. We can start with either a template or from scratch, depending on our preference. Word offers various options for customization that suit different professional styles.
Using Templates
- Open Word: Launch Microsoft Word and select 'Business Cards' from the template search.
- Choose and Download: Browse the displayed templates and select one that matches our desired look. Click 'Download' to open it in a new document.
- Customize Information: Replace the example text with our contact details, including name, phone number, email, and company name.

During customization, we might notice that some templates allow individual edits to each card, while others don’t. Pressing Ctrl + H in Windows or Command + H in MacOS opens the Find and Replace function, making it easier to change duplicated information across cards.
Creating Business Cards from Scratch
If we prefer to design our cards manually, we can follow these steps:
- New Document: Open a blank document in Microsoft Word.
- Set Layout: Adjust the page orientation to landscape and reduce margins to maximize space.
- Insert Table: Click 'Insert', then 'Table', selecting a grid layout (e.g., 2x5) to create multiple cards on one page.
- Add Details: Type our business name and contact information into each table cell. Incorporate logos or graphics using 'Insert' > 'Pictures'.
This approach provides full control over design elements, including colors, fonts, and images, enhancing the overall aesthetic of our business cards. High-quality images can elevate the professional appeal.
Saving and Printing
Once we complete the design, saving our custom template is vital. Click 'File', then 'Save As', entering a name to ensure easy access later. For printing, select heavy cardstock to create durable cards that leave a strong impression.
By utilizing simple tools and features available in Microsoft Word, we can create professional and effective business cards that represent our brand effectively. For more advanced designs or layout ideas, we can explore resources like the 4over4 free online designer or refer to articles on how to make business cards for inspiration.
With the right design and quality materials, business cards become powerful networking tools, contributing to a polished brand presence. Each card we create can align closely with our branding efforts, and by considering custom printing solutions from 4OVER4, we can take our cards to the next level of professionalism.
By employing the strategies outlined above, we can confidently design and produce business cards that resonate with our target audience and reinforce our professional identity.
Choosing the Right Business Card Template

Choosing the right business card template significantly impacts the effectiveness of your design. We prioritize a template that aligns with our brand identity and communicates our core values. To begin, we open Microsoft Word and navigate to 'New.' By searching "business cards," we gain access to a variety of options.
After browsing through available templates, we select one that resonates with our style and requirements. Each template includes a preview and description, allowing informed decisions. For instance, opting for a layout with ample space for our details aids in maintaining clarity.
Once we've chosen a template, customization begins. We replace placeholder text with our business name, contact information, and other relevant details. Incorporating our logo enhances recognition and encourages brand consistency. For a polished and professional appearance, we can adjust colors, fonts, and layouts, ensuring that our cards stand out.
We recognize that templates help save time and effort, while clean designs reinforce our brand image. A well-structured business card features limited text, focusing on essential information for easy readability. For added creativity, experimenting with layout elements and graphic placements can elevate the design further.
To maximize impact, we choose high-quality materials for printing. Heavy cardstock provides durability and a premium feel. For those seeking an even more distinct look, exploring additional printing solutions can introduce unique finishes. Custom options allow for raised printing or unique textures, enhancing both visual appeal and tactile experience.
When finalizing our designs, we leverage resources available online for tips and creative ideas. For instance, checking out guides on how to make business cards can offer valuable insights.
Lastly, we ensure that our final design is saved appropriately. Utilizing our custom templates not only streamlines the design process but also enables a cohesive brand presentation.
We're confident that with the right template and thoughtful customization, our business cards will effectively represent us in all professional encounters. To explore further options, we can visit 4OVER4's business card printing for high-quality printing solutions tailored to elevate our brand presence.
Setting Up Custom Card Dimensions
To create effective business cards in Microsoft Word, we need to set the proper dimensions. This process ensures our cards maintain a professional appearance and fit within standard printing guidelines.
Setting the Page Size
- Open a New Document: Launch Word and create a new document.
- Access Page Setup: Navigate to the Layout or Page Layout tab, then select Page Setup or Size.
- Select Custom Size: From the drop-down menu, choose Custom Size.
- Input Dimensions: Enter the desired card dimensions. Common sizes include:
- UK: 85mm x 55mm (8.5cm x 5.5cm)
- USA: 89mm x 51mm (8.9cm x 5.1cm)
- Japan: 91mm x 55mm (9.1cm x 5.5cm)
For example, setting the dimensions to the standard US size involves entering 89mm x 51mm or approximately 3.5 inches x 2 inches.
| Country | Size (mm) | Size (cm) |
|---|---|---|
| UK | 85mm x 55mm | 8.5cm x 5.5cm |
| USA | 89mm x 51mm | 8.9cm x 5.1cm |
| Japan | 91mm x 55mm | 9.1cm x 5.5cm |
Adjusting Margins
- Modify Margins: To maximize space for multiple business cards, go to the Page Layout tab, click on Margins, and select Narrow.
- Consider Bleed Area: When preparing to print, incorporate a bleed area of 4mm (0.4cm) around each side for a professional finish. This prevents white edges from appearing after trimming.
Table Setup for Multiple Cards
- Insert a Table: Navigate to the Insert tab, select Table, and create a grid suitable for placing multiple cards, such as a 2x5 configuration.
- Adjust Cell Size: Right-click the table, select Table Properties, and set the dimensions of each cell to match the card size, such as 89mm wide and 51mm tall.
- Design Content: Type our details within each cell. Include your name, job title, contact information, and logo to present a cohesive and engaging design.
Final Touches
Custom designs can significantly elevate a brand’s presence. With 4OVER4's solutions, we can access various options for innovative finishes and unique card styles that help us stand out in any networking environment. For efficient card design, consider using the free online designer available at 4OVER4.
By ensuring proper dimensions and optimizing our designs, we create business cards that reflect our professional identities effectively. For additional guidance on making business cards, we can refer to the comprehensive resources available at 4OVER4.
Adding Your Logo, Text & Contact Details

Adding a logo, text, and contact details to your business card enhances brand recognition and provides essential information to potential clients. Follow these simple steps to ensure your card effectively communicates your professional identity.
Step 1: Add Your Text
Customize the template by filling in essential information. Include the following:
- Name: Your name should stand out.
- Job title: Clearly state your role.
- Phone number: Provide a direct contact line.
- Email address: Include a professional email.
- Website: Link to your business site.
- Social media handles: List relevant platforms.
- Address: Specify your business location.
- Personal tagline or slogan: Add a memorable phrase.
Ensure all text is legible, with appropriate font sizes and styles to match your brand's identity. We recommend checking this guide on how to make business cards for more inspiration.
Step 2: Add Your Logo
Incorporating your logo reinforces your brand image. Follow these steps:
- Delete any placeholder image on the template.
- Navigate to the Insert tab and select "Pictures."
- Locate and select your logo file (either .JPG or .PNG format).
Position the logo prominently but ensure it doesn’t overpower the text.
Step 3: Design Considerations
Utilize the design tools available in your template to adjust colors and fonts. Consistency in design reinforces professional identity. For a cohesive look, we appreciate the range of custom printing solutions offered by 4OVER4, which helps businesses elevate their brand presence effectively.
Step 4: Finalize Your Design
After adding text and your logo, review your design. Ensure adequate spacing between elements for easy readability. Experiment with different layouts until satisfied. For unique finishes and professional quality, consider exploring 4OVER4's range of printing services tailored for business cards. Check out the business cards printing options that align with your creative vision.
With these steps, we create business cards that not only share information but also leave a lasting impression. The combination of a clear layout, well-chosen fonts, and high-quality printing makes a significant difference in professional networking scenarios.

Using Tables for Precise Card Layouts
Using tables in Microsoft Word optimizes the layout for business cards, ensuring a professional presentation. Follow these steps for efficiency:
- Open a New Document and Set Margins: Start with a blank document. Set the margins to "Narrow" for smaller borders or customize them to fit specific needs, typically 0.5 inches on all sides.
- Insert a Table: From the "Insert" tab, choose "Table" and create a grid that accommodates your business card layout. A 2x5 table allows printing of 10 business cards on a single page.
- Adjust Table Properties: Right-click on the table and select "Table Properties." In the "Table" tab, ensure the table is centered. Adjust the height for each row to exactly 2 inches, ensuring uniformity across your business cards. Each cell then matches standard dimensions of 3.5 inches wide by 2 inches high.
- Add Your Content: Click inside each cell to insert your details. Focus on essential information: your name, job title, contact number, email address, and website. We can bold the name using a larger font for emphasis, ensuring it stands out. For added branding, integrate your logo using the "Insert Pictures" option.
- Customize Design Elements: Tailoring the colors and fonts aligns the design with your brand identity. Use colors that reflect your branding, and select professional fonts for clarity. Ensure all text is easily readable against the background.
- Remove Borders for Clean Design: Select the table, right-click, choose "Borders and Shading," and set the border option to "None." This adjustment creates a smooth, clean look.
- Consider Printing Options: To elevate our card's impact, consider utilizing custom printing services. 4OVER4.com offers exceptional solutions that amplify our business presence through high-quality materials and finishes. This focus on detail in printing reinforces brand identity effectively.
By following these steps, we can create professional business cards that effectively communicate our brand. For further design enhancements, we can explore resources like the free online designer provided by 4OVER4.COM.
With these precise card layouts, our business cards will leave lasting impressions, enhancing networking opportunities and professional connections.
Customizing Fonts, Colors & Styles
Choosing and Customizing Fonts
Selecting a font requires careful consideration of readability. The limited space on a business card demands fonts that clearly convey information. Avoid fonts with excessive swirls or ornate details that obscure contact details. For uniqueness, we can find free downloadable custom fonts on websites tailored for this purpose. Always test these fonts on an actual business card size to ensure legibility.
In Microsoft Word, customizing the fonts in our business card templates is straightforward. We can select the desired text and choose a new font from the Home tab in the ribbon. This flexibility allows us to tailor the appearance to match our brand identity effectively.
Selecting and Customizing Colors
Choosing colors that align with our brand identity enhances recognition. We recommend opting for colors that provide sufficient contrast against the background for optimal readability. For example, dark colors on a light background or light colors on a dark background promote clarity.
Utilizing color effectively not only reflects our brand but also draws attention to essential elements. By maintaining coherence in color themes, we strengthen our overall design.
Style Considerations
Creating a polished style involves more than just fonts and colors. We can enhance our business cards by incorporating elements like logos and graphics that reinforce our branding. Custom styles should ensure clean designs that emphasize critical information, making it easy for anyone to understand our message at first glance.
Utilizing 4OVER4 for Custom Printing Solutions
4OVER4 provides exceptional custom printing solutions that help elevate our brand presence. By leveraging their offerings, we can obtain high-quality prints that reflect our unique identity. Their services ensure that our business cards stand out in professional settings, effectively communicating our brand's message.
With services like business card printing and free online design tools, we gain access to resources that enhance our card designs. These tools help ensure that our final product not only meets our standards but also resonates with potential clients and partners.
By focusing on fonts, colors, and styles, we can create distinctive business cards that effectively represent us. Through 4OVER4, we achieve top-notch results that forge memorable connections in networking scenarios. For detailed insights on crafting business cards, we can refer to how to make business cards.
Inserting Images & QR Codes
Inserting images and QR codes enhances the visual appeal and functionality of our business cards in Microsoft Word. We can easily achieve this by following a few straightforward steps.
Inserting Images
- Navigate to the
Inserttab in Microsoft Word. - Select
Picturesto choose an image file from our device. - Adjust the image size for optimal fit on the card layout.
- Position the image accurately within the card design by dragging it to the desired location.
- If we're using a table or label template, ensure the image aligns properly within the cell or label area for a polished look.
Inserting QR Codes
- Create a QR code using an online generator, ensuring it links to our website or contact details.
- Save the QR code image to our device.
- Use the same method as for inserting images to add the QR code to the business card.
- Size and position the QR code appropriately, ensuring it remains scannable and prominent.
Importance of Custom Printing
Utilizing 4OVER4’s custom printing solutions significantly enhances our business cards’ effectiveness. Their services allow us to feature high-quality images and QR codes, providing a professional finish that stands out. High-quality printing materials from 4OVER4 elevate our cards' durability and visual impact, making a memorable impression during networking events.
By leveraging their business card printing options and free online design tools, we can ensure our cards not only convey essential information but also reflect our brand identity effectively.
Example of Use
Below is an example illustrating how our card design can incorporate images and QR codes:
| Element | Description |
|---|---|
| Business Logo | Placed in the top left corner for branding |
| Personal Tagline | Positioned beneath the logo in an eye-catching font |
| QR Code | Located on the bottom right for easy scanning |
| Contact Info | Clearly listed for readability |
By following these guidelines, we can create impactful business cards that effectively represent our brand while utilizing visuals that draw attention and facilitate connections. For further design inspiration, refer to this guide on making business cards.

Printing Setup: Margins, Bleed & Alignment
When establishing our business card design in Microsoft Word, detailed attention to printing setup is essential for achieving a professional look. We focus on three key aspects: margins, bleed, and alignment.
Margins and Page Setup
Setting accurate margins helps ensure that all design elements fit within the printable area of the card. We open a new Word document, navigate to the "Page Layout" menu, and customize the margins. Typically, margins should be set to 0.5 inches on the left, right, and top, and 0.2 inches on the bottom.
Using a table enhances card layout. We can insert a table with rows and columns based on the number of cards needed. For instance, setting row height to 2 inches and column width to 3.5 inches supports a standard business card size.
Bleed
Bleed is crucial when designing business cards. It ensures that our design extends to the edges without leaving any white borders. When we design, it’s important to remember that any element that touches the edge of the card must extend beyond the trim line to account for minor inaccuracies during printing.
Alignment
Proper alignment guarantees the card prints exactly where intended. Whether conducting a single print job or multiple cards on a single sheet, we must turn on crop marks. This feature aids in aligning our publication accurately to the designated areas on the printing sheet.
If planning to use specific manufacturers' products, it’s vital to select the appropriate template beforehand. Understanding the printer’s non-printable area supports effective margin setups, as adjusting margins without this knowledge could lead to misaligned designs.
For those pursuing high-quality prints that enhance brand presence, utilizing services from 4OVER4 offers superior custom solutions. This showcases our brand effectively with professional finishes. By using the 4OVER4 free online designer, we can visualize our card before printing, ensuring every detail meets our expectations.
By ensuring each aspect of printing setup is meticulously handled, we position our business cards for impactful networking opportunities. With awareness of margins, bleed, and alignment, we create cards that leave lasting impressions.
Saving & Exporting for Professional Printing
When it’s time to save and export your business card design, following the right procedures ensures quality results.
- Open the Document
Open the document containing your finalized business card design in Microsoft Word.
- Print Settings
Choose Print from the File menu, or press Ctrl + P. Ensure your printer is recognized for high-quality printing.
- Test Print
Conduct a test print of one page to verify alignment and color accuracy. This step helps prevent issues before printing a full batch.
- Exporting as PDF
If preferred, export the design as a PDF for crisp results. Select File > Save As and choose PDF as the format. This method maintains the layout and quality.
- Professional Printing Advantage
Consider professional printing options for large quantities. 4OVER4 offers custom solutions that enhance brand presence through superior finishes and paper quality. Check their business card printing options for a variety of choices tailored to your needs.
- Using Online Design Tools
We recommend leveraging online design tools for simpler processes. With 4OVER4’s free online designer, creating and customizing business cards becomes seamless, saving time while ensuring professionalism.
- Ensuring Quality
Using a high-resolution printer is crucial. High-quality prints ensure sharp text and vibrant colors, giving your business cards the impact they deserve.
By adhering to these steps, we can guarantee that our business cards will stand out in any professional setting.
Conclusion
Creating business cards in Microsoft Word is a straightforward process that empowers us to showcase our professional identity. By leveraging the tools and techniques outlined, we can design cards that truly reflect our brand.
From selecting the right template to customizing every detail, each step allows us to express our uniqueness. With attention to layout, color, and quality, our business cards can make a lasting impression.
As we take these steps toward crafting our cards, let’s remember that they’re not just pieces of paper; they’re gateways to meaningful connections. So let’s get started and make our business cards a powerful tool in our networking arsenal.
Frequently Asked Questions
How do I create business cards in Word?
To create business cards in Word, open the software, select 'Business Cards' from the templates menu, and choose a template you like. Customize it with your contact information and logo. Alternatively, you can create one from scratch by setting up a new document and adjusting the layout to fit multiple cards.
Can I use a template for business cards in Word?
Yes, templates are available in Microsoft Word. You can access them by opening Word, clicking on 'More Templates,' and searching for 'business cards.' Choose one that matches your style and customize it to fit your branding.
How can I add a logo to my business card in Word?
To add a logo, click on the area where you want to insert the image, go to the 'Insert' tab, and select 'Pictures.' Upload your logo and adjust its size and position to align it professionally with your card layout.
What materials are best for printing business cards?
For durability and a professional look, it’s best to use heavy cardstock. Consider high-quality options that complement your design. Custom printing services like 4OVER4 can offer unique finishes to enhance your cards further.
How do I adjust card dimensions in Word?
To adjust dimensions, create a new document, go to 'Page Layout,' and select 'Size' to enter custom dimensions. Set the margins to maximize your design space and ensure a professional appearance for your business cards.
How can I ensure my business card design is readable?
Choose fonts that are clear and readable, and use color combinations that provide enough contrast. Test your design at the actual card size to make sure everything is easy to read and visually appealing.
What should I include on my business card?
Essential information includes your name, job title, company name, phone number, email, website, and social media handles. Adding a logo and a personal tagline can enhance your brand recognition and make your card memorable.
How can I create unique designs for my business cards?
Explore different templates and customize elements like fonts, colors, and layouts. Use creative tools and online resources for inspiration, and consider incorporating images or QR codes for added visual appeal.
How do I set bleed and alignment for printing business cards?
To set bleed, ensure that your design extends beyond the card’s edge. Adjust margins in the layout settings and use a ruler or guides to guarantee proper alignment. This will help prevent any white borders when printed.
How can I save my business card for professional printing?
Once done, go to 'File,' select 'Export,' and choose 'Create PDF/XPS Document.' This ensures high-quality output. Conduct a test print to check alignment, and consider using professional printing services for a polished finish.
More from Designing

3271
It can be difficult for people to remember all the professionals they meet at business functions. That is where well-designed business cards c
![]() Matthew Prince
Matthew Prince
Sep 14, 2023
46832
In our digital age, networking and making a memorable first impression is
![]() Matthew Prince
Matthew Prince
Jul 21, 2023

3689
In the world of fashion, first impressions are everything. As boutique owners, we know the importance of standing out, not just with our desig
![]() Matthew Prince
Matthew Prince
May 19, 2023

10806
ls builds a cohesive, recognizable brand. Using the same professional headshot on business cards, digital platforms, and marketing collateral
![]() Matthew Prince
Matthew Prince
Mar 10, 2023

3054033
It’s undebatable that colors change the look of prints either for the better or worse and that's why working with a
![]() Emma Davis
Emma Davis
May 7, 2021
3973979
When a company is mentioned randomly, most of the time, what comes to mind is its powerful logo design. In fact, in 2014 Nuanced Media reveale
![]() Emma Davis
Emma Davis
Apr 30, 2021

3345789
In the fast-paced world of business, expressing gratitude can often be overlooked. Yet, a simple "thank you" can go a long way in strengthenin
![]() Emma Davis
Emma Davis
Jan 16, 2021